Showing posts with label handmade. Show all posts

Saturday, November 9, 2013

Easy Crochet Red-Nose Reindeer Baby Hat

The holiday excitement has hit me early this year, so I'm taking it out on crochet.  Knitting and crochet are winter activities for me—I just can't get all tangled up in wool yarn in the hot summer months.  Last year I didn't do much crochet, but now that I've got some little muses in the form of my friends' kids, I'm back with a vengeance.  First project of the season: reindeer hats!

Image via JTeasycrochet

I sucked it up and bought an instant download pattern from Etsy, which was totally worth it.  I usually try to find something for free but there's a lot of sorting through the very cheesy junk. Plus this has easy instructions and pictures.  I made two, one for 0-3 month old Julia, and the other for 3-6 month Arianna. I wanted to get them done in advance so they could be worn throughout the Christmas season.

You need 4 yarns altogether, and I strayed slightly from what the pattern suggested so I could use what I had instead of buying an entire skein to make two tiny eyes. I used:
-For the head, Lion brand silky twist, super bulky #6 in Oatmeal
-For the antlers and ears, Lily Sugar 'n Cream #4 worsted weight in Ecru
-For the nose, some leftover maroon worsted weight, not sure of the details
-For the eyes, Lion brand Wool Ease #6 in Charcoal

Baby hat, minus the baby

You can crochet this pretty fast since baby heads are so small.  The pattern was very easy, beginner level, the trickiest part was attaching the ears and antlers.  I recommend using a tapestry needle to sew them on.

Sew them tight so they stand up

I don't have a baby to model it on, so here it is  eating a lamp, and looking a bit like Fozzie Bear.


Again, if you want to give it a shot you can pick up the pattern at the JTeasycrochet Etsy shop

On another note, happy 111th post!

Saturday, October 26, 2013

DIY Glittery Spiderweb Halloween Cards with template


Last October, Hurricane/Superstorm Sandy prevented most Halloween celebrations, and although I don't usually get too into the holiday, having a year off may have been just what I needed to get the spirit back.  For my cards this year, I'm going all the way with glitter. 

Using some regular Elmer's Glue and black glitter, these spiderweb cards are a synch to make. You can freehand a spiderweb design, or download and trace the template I've created from my sketch. Obviously you could glitter up anything, for any occasion, but hey, let's focus on the coming holiday.


Step 1: 
Create a spiderweb design freehand, or download and trace the template I've created from my sketch. Remember to keep your pencil marks light.

Step 2: 
Trace over the drawing with white glue.  I used a toothpick to get in small areas or to clean up any slips (there will be some).  Hold the bottle at an angle to prevent it coming out in globs and work in small sections so that glue doesn't dry before you can add the glitter. Superfine glitter will work best on these thin lines.

Step 3:
Sprinkle glitter over top. Let stand about 30 seconds, and then tap off excess.  You can go back in with a toothpick and clean up any smudges.  I like how non-uniform the lines are, it almost give the feel of water droplets on the web.

Optional: To keep glitter in place, cover the card with 1-2 coats of acrylic spray.  I used Krylon Crystal Clear Acrylic.  Make sure to spray in a well ventilated area. Right outside your front door with the door open so all the fumes go back in the house is not considered a well ventilated area (I'm telling myself this).  

Have a spooky Halloween!

Sunday, September 29, 2013

Goodies from the Peter's Valley Craft Fair

Being a native of Sussex County, NJ, it's a wonder that I've never been to this craft fair before.  Peter's Valley Craft Center is a non-profit art center offering classes and workshops for both adults and children in a variety of mediums including ceramics, jewelry, photography and glass. Located near the Delaware Water Gap in Layton, NJ, attendees can even stay on the grounds of this beautiful rural area while they take longer workshops.  The annual craft fair is held at the Sussex County Fair Grounds because it's so large, and I was blown away by the quality and quantity of work.

The majority of goods there were pottery, jewelry, knits, and photography, with a few others crafts thrown in there.  Though I couldn't take photos at the event, I did restrain myself to buying a few things.

This first one is an adorable plate from Natures Nest Pottery, featuring Russian nesting dolls, that I went loco for and had to have.


Gorgeous colors

Awesome detailing
I picked up a few of these whimsical brass ornaments from Aurna Enterprises.  They have a zillion and there all adorbs.

Verdigris finish like the Statue of Liberty


And lastly, one of these beautiful leaf bowls from The Clay Cellar pottery.  I can't reveal which one, since it's a gift for someone who reads this blog!

Image via theclaycellarpottery.com

Be sure to mark your calendar for next years fair! Until then, check out a few more of my favorites from the show.

Diarama-esque shadow boxes from Working Birds Studio
Everything from the artists at the Potters' Guild of New Jersey
Lawn decor from Iron Art Studio
Gorgeous stones in the jewelry of Hudson Valley Goldsmith
  

Thursday, July 25, 2013

Starbucks Coffee Perfection features cut paper and block printing

This artful new video spot for Starbucks Coffee is making its way around the interwebs and I'm happy to share it since it features a few of my favorite things! Animator Rogier Weiland used cut paper to create this stop motion film showing where the coffee comes from. It also appears from the behind the scenes photos to use block printing with laser cut laminate wood and coffee as ink.  Hooray for authenticity!


You can also check out some behind the scenes photos on Weiland's website and make guesses about how much time it actually took to make this (answer: loads).  Plenty of other cool paper stuff there as well!

Monday, July 22, 2013

Pug and Bulldog Illustration

Though I've never met Frank and Lola, this pug and English bulldog have a rather charming story. Found together as puppies sharing an abandoned box in downtown Philadelphia, they love and take care of each other like brother and sister.  This pen and ink line drawing of the two pudgy pups will make its final home in a logo (though I'm not quite sure for what).  India ink on watercolor paper.

They love each other.

Lola, the bulldog

Frank, the pug

The collars were added to the original illustration to add some personality and ensure the dogs wouldn't be taken to the pound and euthanized. Here's the original, sans collars.

This is being naked for a dog.

Interested in a custom illustration of your dog? Email info@lightheartpapercompany.com

Friday, July 12, 2013

Colorful Dreamcatcher Art

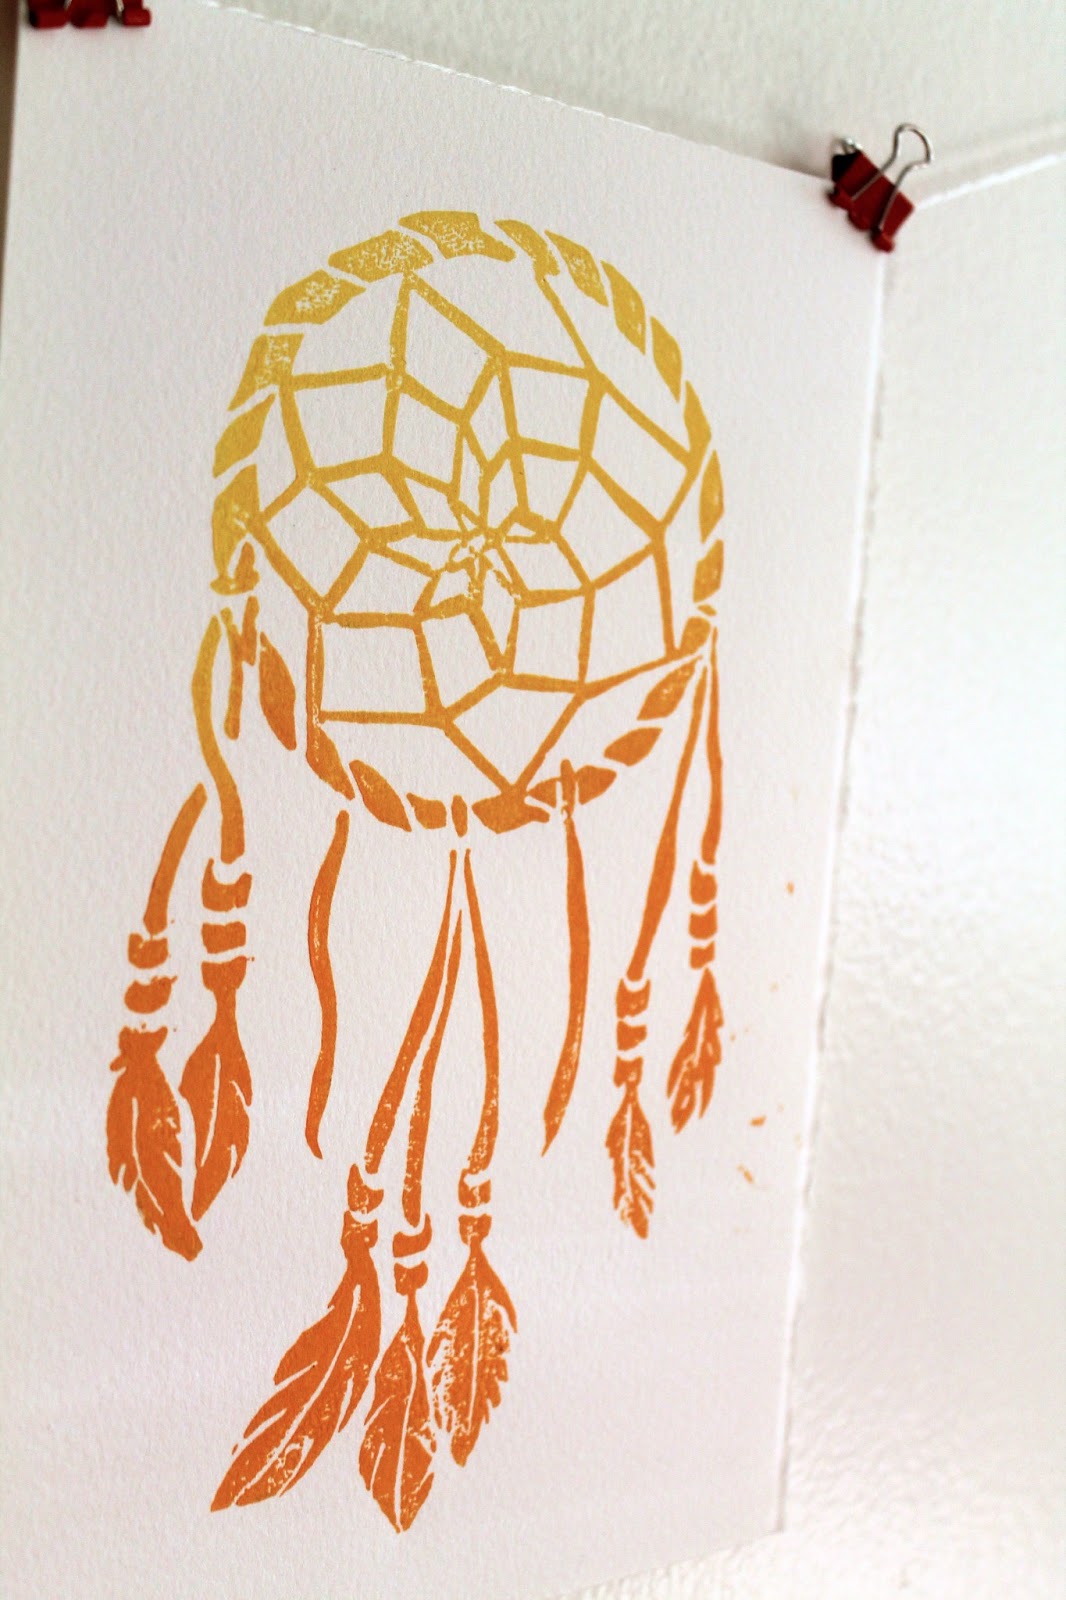
After my recent trip to the Utah and Arizona, I was feeling the inspired by the brilliant colors and native spirit of the southwest. I got a little caught up in the vacation mindset and bought a dreamcatcher from a little mountain shop.  I built one from a kit when I was just a little guy (one of the many craft kits that actually resulted in a finished project), so when I got home, I decided to make an adult version (in a totally SFW way). The result is these linocut prints in yellow/orange and gold.

Very Boho

Gold, or dorado

Both colors are available to purchase in the Etsy shop, Lightheart Paper Company, orange and gold.

Unlike a lot of my other prints, this one I drew entirely by hand, no Adobe Illustrator involved.  Here's the sketch, which started in pencil and ended in sharpie.


Originally I had intended to add some text at the top saying "Sweet Dreams," which you can see ghosts of in the sketch, but in the end it seemed better to leave it off.  I may add it as separate stamp in the future, that way it can be printed with or without the text.

I'm going to hang one or two of these above my bed with the real one in hope that I can stop having the dream where I am in school but don't know where I'm supposed to go!

Thursday, June 20, 2013

Illustrated Cityscapes: Chicago


The Chicago skyline stands tall in this black and white illustration, commissioned for a save the date. I've never been to there, but it's on the "to visit" list right below Boston, only because Boston is  driving distance from me.  Done in the usual fashion: India ink on watercolor paper.


I like the skylines the best when they include boats.


Sunday, June 16, 2013

Wednesday, June 12, 2013

The wolf

The art store in my Jersey City neighborhood displays murals on their outside wall, and the current one is particularly awesome.


I love the contrast of the fierce, radioactive wolf against the sad Disney bunny and the geometric shapes mixed with the eerie forest. Or maybe I can't get enough of neons. Either way I'm going to enjoy walking past it every day.  

He won't think twice about eating you

Smoking is bad, especially for bunnies

Monday, June 10, 2013

Map Illustration: Reading Terminal Market

Maps are awesome and I love them. Now you know. So when commissioned to do a map illustration for Philadelphia's Reading Terminal Market, where you can apparently have weddings, I was suffice to say, pumped. If you've never been there, it's a seemingly endless hall of food vendors selling delicious and mostly decadent foods. To be honest I'm not sure how it works when you hold a wedding reception there, but I was tasked with helping the out-of-towners and towners alike navigate the events of the celebration in a fun and easy way. 

Not to scale.
Each vendor is marked by a little illustration showing the kind of food they have, and there are illustrations for the dance floor, seating, desserts, and of course the bathrooms.  The map was included in the invitation, which would get anyone excited for a belt-loosening cocktail hour.  Here are some close ups.  

Sushi and a Thanksgiving turkey: world's collide
You'll know where to bring your song requests before you even get there.

Here's an overhead of the whole thing:

To Market!

I'd like to continue some map explorations, especially one of my trip out west, and incorporate some of those deep reds and blues.  I smell a summer project...

Want to chat about a customized map? Email me at info@studiohearttohand.com.

Wednesday, May 1, 2013

Watercolor wishes

This watercolor illustration has been a long time in the making. I hesitated on it for a while because I couldn't find the right words and wanted to use my own instead of a quote. It was, however, inspired by a meditation/prayer which I learned on my spiritual journey, but was unable to trace the origin of, "May you be happy, may you be healthy, may you live with ease."  You're supposed to say it to yourself when someone has pissed you off or has caused some deep therapy-necessitating emotional damage.  This one is more suited for a new home or marriage.

It's like, my version of an Irish wedding blessing

While technically I "hand drew" the letters, I did pretty much copy actual fonts while adding embellishments.

Cheater, cheater, pumpkin eater. Wait those aren't the words.

The colors aren't playing nice together and I don't like what's going on with the wind illustrations here. So those are changes that I'll be addressing in the next round.

You can even still see pencil marks--someone's lazy!

I do like the sunshine!

So there's the beta version, a happy wish for friends and enemies alike.

Monday, April 29, 2013

Busy springtime

With the collision of weddings, birthdays, and deadlines, it's been nonstop action this April.  My  conversations all begin with my asking, "When is it going to get warm?" to which my boyfriend sincerely responds, "I think this week it's supposed to be nice." And after one nice day, it goes back to 50 degrees.  But now that the storm has passed, I'm looking forward to a few creative weeks before a road trip vacation to the wild, wild west (this one, not this one).  The biggest news: the soon-to-launch etsy shop where I'll be selling my prints!  And now that I've written it here, I'm committed to it.  Here's a preview of the newest woodblock.

Here you are, a message of love. 

I'll be sure to make an announcement when it goes live!

Monday, April 15, 2013

Arts and Crafts at the Herb Farm

Well Sweep Herb Farm in Port Murray, NJ

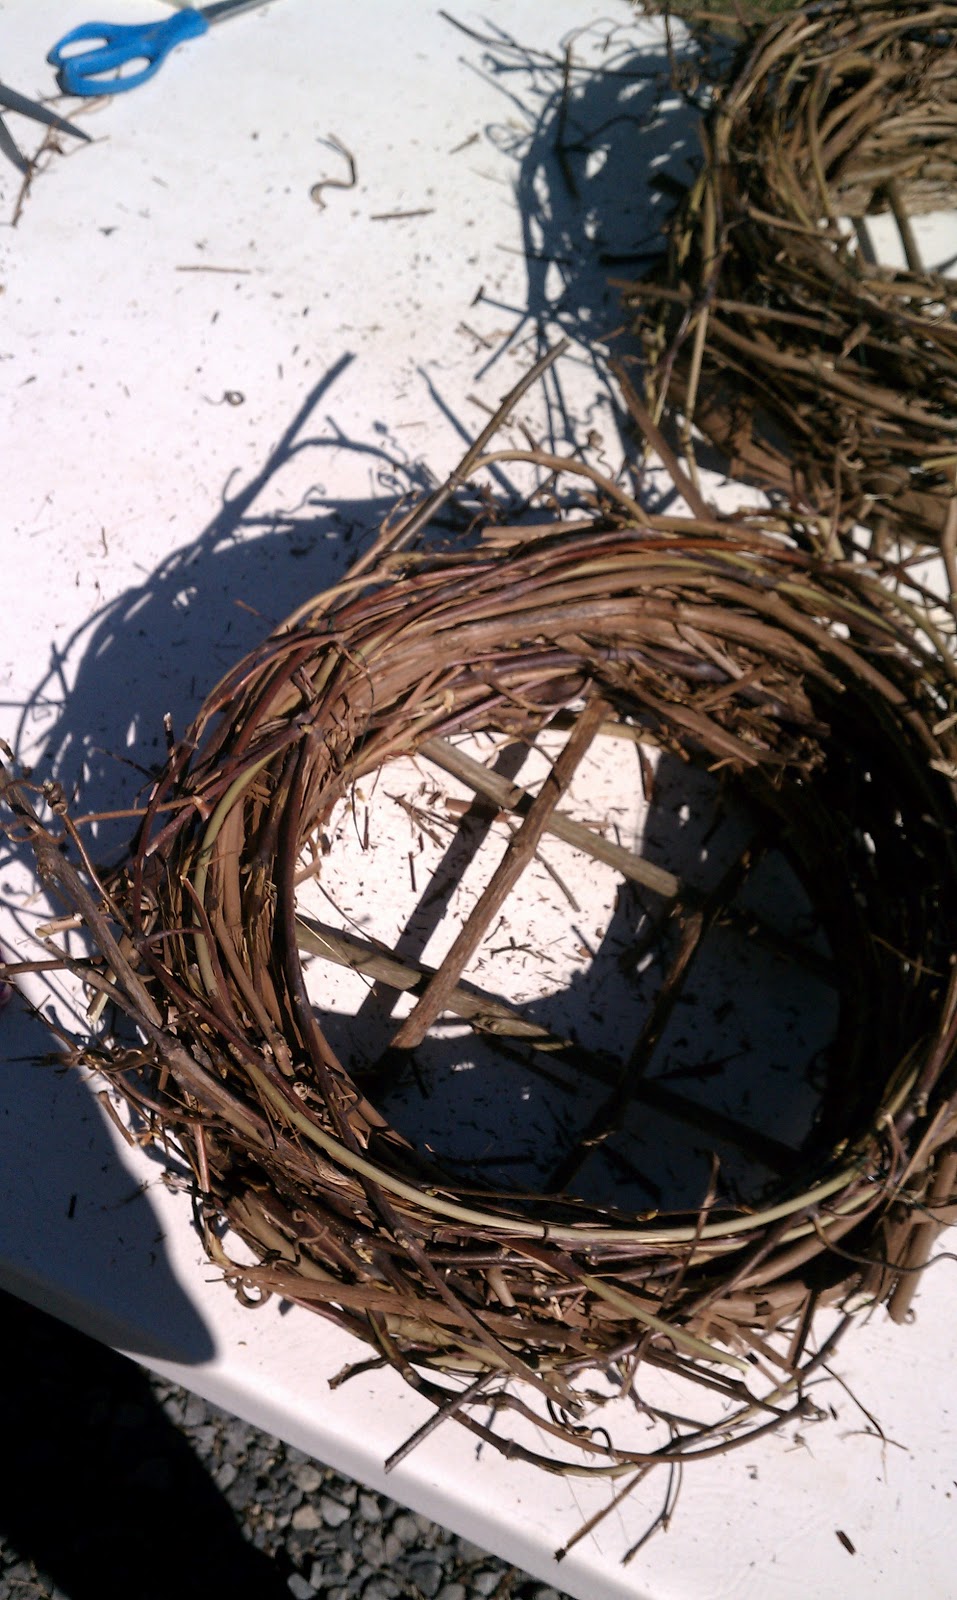
Last Saturday I spent a lovely morning at Well-Sweep Herb Farm where I took a DIY herb planter class with some friends.  I went in there thinking that we'd build a tray and put some basil in it, no biggie, but I was in for a surprise.  For starters, we built the planter by essentially coiling up a nest out of dried grape vine, which is requires the tremendous arm strength and at least two people.

Our tablemates,
whom we hit with the vines a lot

My planter-to-be
We then stuffed it with netting and dirt and planted our choice of 5 herbs.  Mine has rosemary, dill, cilantro and two kinds of parsley. I can't recall the exact names, but it wasn't the normal store-bought variety.

New friends

Here's my finished product:
I intend to not let die

Afterwards we ventured around the farm and greenhouses.  Being on herb farm is a lot like being on a regular farm, except everything is in miniature.  There was even a miniature cat, also known as a kitten.

A crazy variety
Here's a few tall outliers
If fairies exist, they surely live here
More delicious smells and humidity in the greenhouse

If you're local and can make it to Well-Sweep, they offer lots of weekend workshops and are some friendly folk.  Or check out your own local garden centers or farms, they're fun even if, like me, your garden is limited to that planter you just made!  

Wednesday, March 20, 2013

Bridge illustration no. 2

Not too long ago I posted an illustration of the Manayunk Bridge, and I'm here to post another illustrated river crossing in Philadelphia.  I'll be spending a few weekends there this spring, and I look forward to exploring this city that I'm coming to like more and more with each visit.  Maybe I have a soft spot for old Ben, being an F&M alum, or maybe it's the fact that the mortgage payment on a 3-br house is as much as the rent for my studio apartment.

Anyway, I'm not actually sure what the name of this bridge is so if anyone does, please post in the comments. 


And as always a close up.

You can tell the lights are on from the light bursts.

Happy first day of Spring!  Although the forecast tomorrow calls for snow.  We might as well be living in Canada!

Monday, March 11, 2013

Quick Personalized Stationary

As you can probably tell from my frequent post about cards, I love sending mail. When a boxed card just won't do, and you are short on envelopes, it's easy to whip up a quick, personalized bit of stationary using stamps, cover stock, and some fun paper. 

Leave a pretty note on the car you hit and the owner can't be mad.

To create a unique envelope, simply deconstruct another envelope (make use of that junk mail), trace the shape onto scrapbook paper or some other lightweight paper, cut and reassemble.  Cut your cover stock to fit inside and adorn with your personal monogram or anything else you can come up with.  Don't limit yourself to stamps either!  Now you can write your correspondences like they are always doing on Downton Abbey when they aren't killing off main characters.

A heartfelt apology.

Now you have a very personal note ready in 10 minutes or less!  I'm sensing a "quick and easy" theme starting to emerge for March.


Monday, March 4, 2013

20 minute paper "button" garland

With a spare gap of time before dinner, and an itch to do something crafty, I made up this quick paper garland with in just a few easy steps.  All you need is the right tools and 20 minutes--it's easy as pie!

Spice up your generic lamps